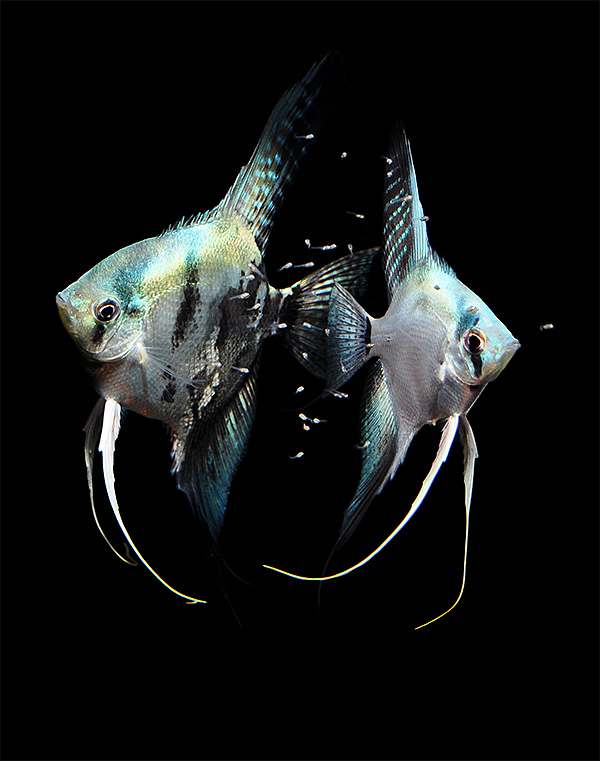
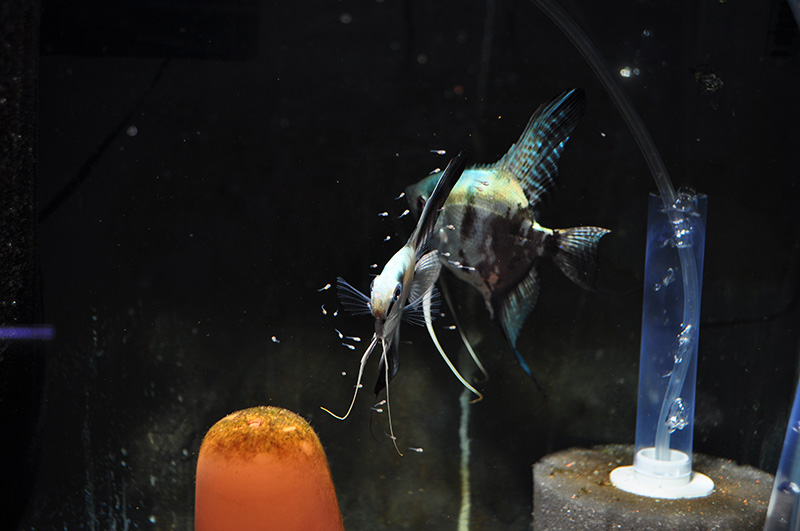
A male Blue Smokey Angelfish, left, from breeder Mike Gibbs, and female Blue Ghost Angel from Lee Gordon, guard their young family.
How’d you get those photos Matt?
Most of my Angelfish breeding has been accomplished using artificial incubation. But when all the larval tanks are full, parents are left to do with their eggs as they please. For the first time, this pairing of a male Gibb’s Blue Smokey (Sm/+ – pb/pb) and a Lee Gordon 50% wild F2 Blue Ghost (S/+ – pb/pb) decided to be good parents, at least for a little while, showing off the parental care that Cichlids are known for (a behavior I sorely miss in my marine fish breeding projects). The Angel pair decided to cooperate and gave me some great shots.
Of course, the above photo didn’t come out of the camera looking that way. To give you a sense of context, here’s what their tank actually looks like.
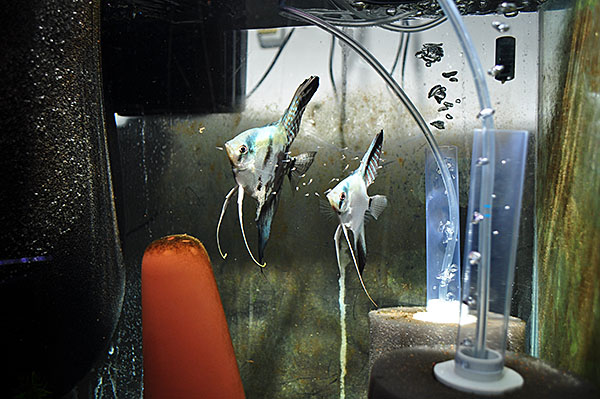
This is a fair representation of the tank I was photographing.
I shoot with a Nikon D5000 and a “nothing particularly special” lens. The larger game changer has been shooting with shutter priority settings and a hand-held flash. Typically with the D5000 this setting results in a very shallow depth of field.
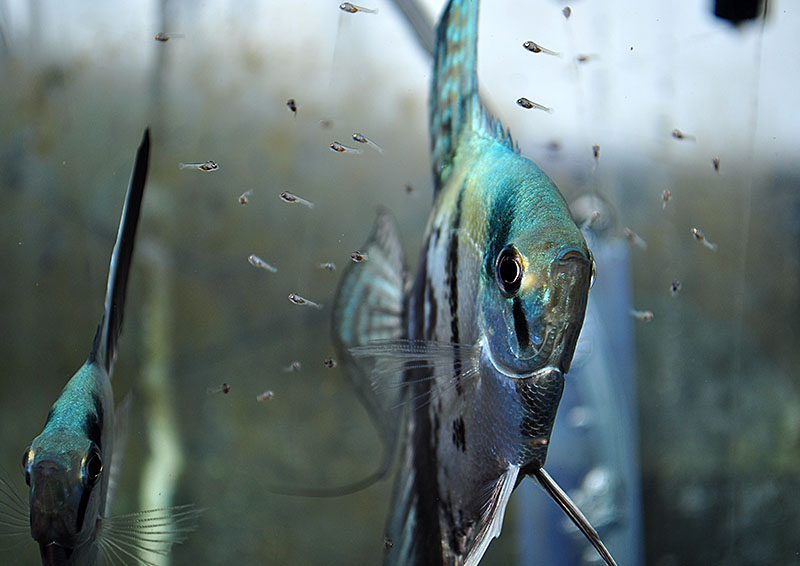
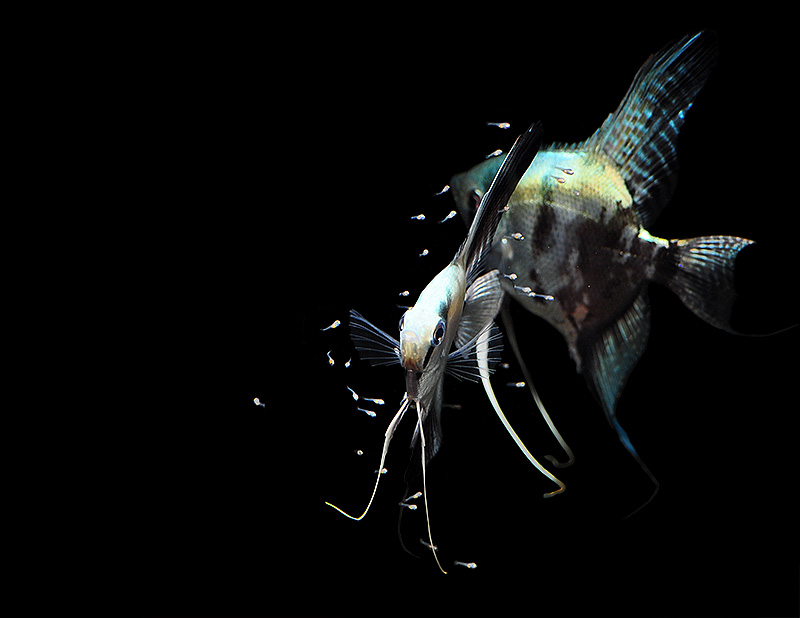
The fry seemed to alternate flocking between their mother (in the background) or, as in this photo, the father.
It takes only a 1/4 strength setting on the flash to sufficiently illuminate this up close photography; the low strength setting allows the flash to recharge quickly. This enables me to shoot in burst mode as well, resulting in several photos in random succession to get the perfect composition and pose of the subject matter.
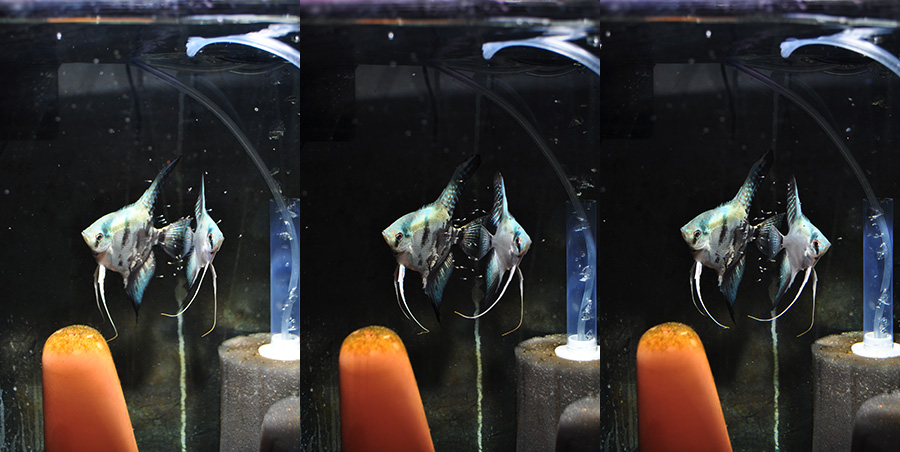
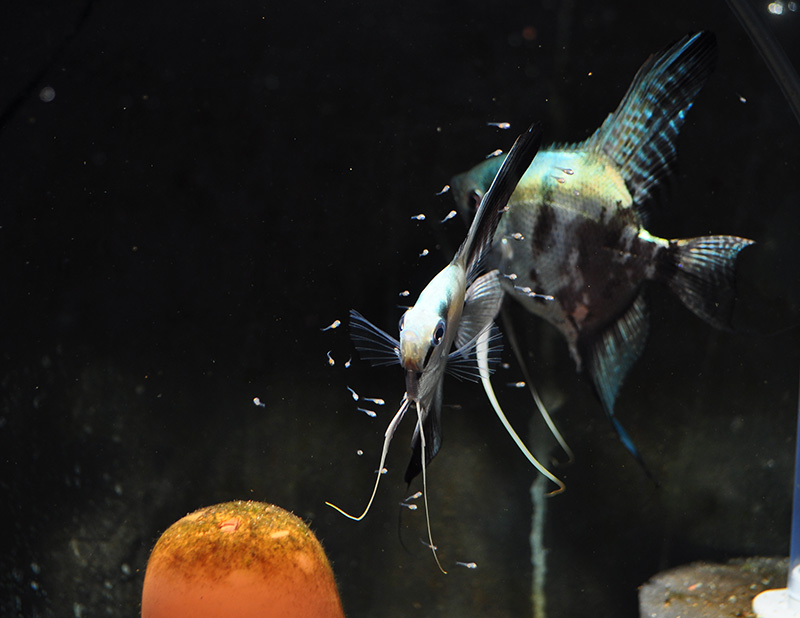
A quick burst of three…one of these was better than the other two. (hint, it was the third one, used to create the opening shot. I’ll show you how in a just a bit)
The handheld flash comes in particularly useful; the positioning of the flash to the side, above, farther back, closer up, dramatically influences the lighting in the photos. Shooting with the flash positioned mainly above tends to illuminate the fish while dropping out the background—there’s no black draping behind this shot, it’s simply achieved through positioning of the hand-held remote flash.
The original, out of the camera, version of this Blue Angelfish pair.
Of course, photograph doesn’t end with the camera. Yes, Photoshop. Sure, some photographers feel that any Photoshop is “cheating”…of course there are photographers (fewer and fewer) who feel you’re only taking legitimate photos if you’re shooting on film! Ultimately, there are uses of Photoshop that cross lines (for example super saturating coral colors beyond reality), but the judicious application of digital retouching is simply another tool available to the modern digital artist. So, to create the final composition, here’s what was done in Photoshop. First, I cropped the photo down to a composition I preferred.
Step 1, crop the photo…
While the hand-held flash trick drastically reduces the background in this shot, adding a levels adjustment layer, and deepening the blacks, pushes the contrast just a little bit and brings the background closer to black.
Step 2, adjust the levels…
Obviously, the difference is subtle but it pushes us closer, which makes the next steps easier to accomplish. At this point, I duplicate the original photo layer (it’s now a backup). Underneath the new copy, I insert a blank layer and fill it with solid black (RGB hex color code #000000).
The next to last step; erase everything except our photo’s subjects. Specifically, erase the surroundings out of the duplicated layer, above the solid black layer. Over time, I’ve discovered that for areas of the subject that are in greater focus, an eraser brush with a harder edge is more suitable. For less focused areas of the photo (in this case, the male in the background) a very soft edge to the eraser is in order. There’s no real shortcut to stripping away the background; this is up-close work, zoomed in, and can be tedious at times. You’ll be using the history (and rolling back) quite a bit.
I should mention that on a dark background like our original here, “black” is the direction to head. If I wanted fish to ultimately reside on a white background, the only way to head in that direction is put them on a white background before photographing; transparent portions of fins are always going to reveal the background color behind them.
The importance of the brushwork (and heading in the right direction with the background color) is revealed in this view; the softer edges allow the fish to blend well onto the flawless black background. If you use a hard edge throughout, you’ll kill the organic edges on less focused areas of the image, and the “work” done on the photo becomes readily apparent. When hiding the underlying layers, you can see that the erasure is not a crisp edge, and would look like junk over a white background.
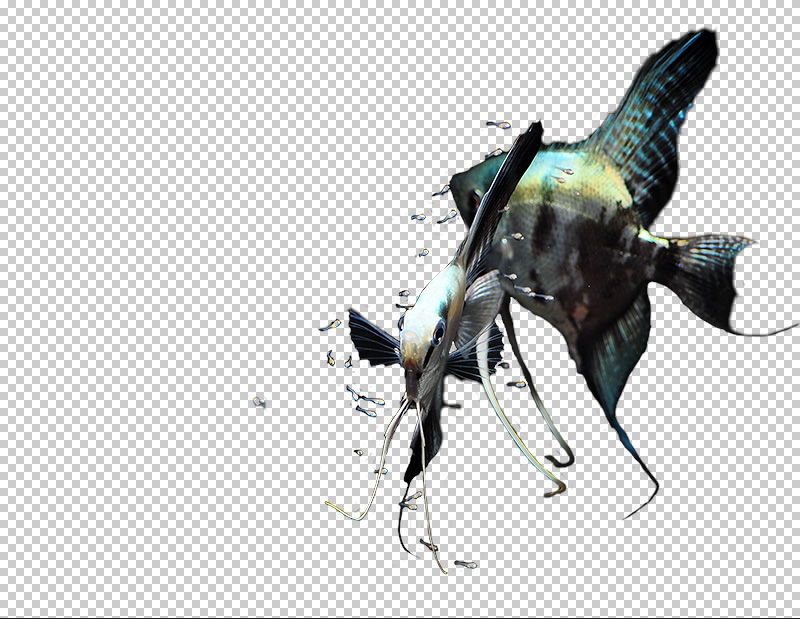
Step 3, kill off the background…
I also use the view above to reveal any areas of background I missed erasing.
The last step is arguably the polish; most digital photos benefit from a slight amount sharpening. For a long time I used the standard “one and done” sharpen filter to crisp up my images. Last year author Tony Vargas shared with me his typical image post-production, which included the use of the “smart sharpen” filter. Ultimately, this more advanced filter allows for more subtle adjustment to an image; less “in your face, obviously retouched”. I’ve mainly noticed this filter truly helping pop up scale details in my photos, turning an already in-focus image into something just that much better. In this photo, the smart sharpen also really helped define the fry.
The final version, with the background stripped away to focus on the female angelfish & her fry.
Photoshop won’t make you a better photographer, and it can easily be abused. Having better equipment only takes you so far as well (although I’d argue that a hand held remote flash is exceptionally beneficial) Ultimately, taking a ton of photos, and playing with camera settings, helps you learn what works and what doesn’t. It comes down to the basics too..if you can’t take a photograph that’s in focus, nothing else really matters (kudos to aquarist Gary Parr for really hitting that home in his photography talks). I’m absolutely no expert, but in the past 7 years I’ve seen the quality of my photos really improve. Keep practicing, the results will only get better.
Additional Info
Gary Parr’s ReefThreads Podcasts


Trackbacks/Pingbacks